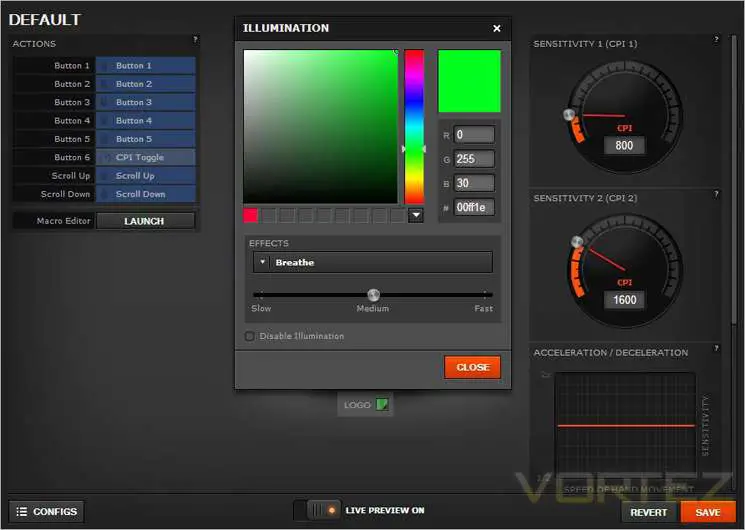
Changing the DPI of the Steel series mouse is a common task for gamers. DPI refers to “dots per inch,” which is the sensitivity of the mouse to the movements of the hand. A higher DPI setting means that the cursor will move more quickly across the screen with less mouse movement, while a lower DPI setting means the opposite.
How to Change Dpi Steel Series
Luckily, the process of changing the DPI of a SteelSeries mouse is relatively simple. Here’s a step-by-step guide on how to change the DPI of your SteelSeries mouse:
Step 1: Installing SteelSeries Engine Software
The first thing you need to do is to install the SteelSeries Engine software on your computer. It is the software that will allow you to configure and personalize your SteelSeries gaming peripherals. You can download it directly from the SteelSeries website.
Once downloaded and installed, make sure your SteelSeries mouse is connected to your computer.
Step 2: Open SteelSeries Engine Software
Launch the SteelSeries Engine software on your computer. After opening the software, it will automatically detect any connected SteelSeries devices. You should be able to see your SteelSeries mouse listed on the home page of the software.
Step 3: Select Your SteelSeries Mouse
Click on your SteelSeries mouse to access its settings in the software. A new window will appear, displaying all the available settings for your mouse.
Step 4: Adjust DPI
Next, you can adjust the DPI setting by using the slider located at the top of the settings window. You can either move the slider left or right to lower or increase the DPI, respectively.
Alternatively, you can also manually enter a specific DPI value in the designated field next to the slider.
Keep in mind that different SteelSeries mouse models may have different DPI ranges. Therefore, make sure to check the maximum and minimum DPI values that your mouse supports before making any adjustments.
Step 5: Save and Apply Changes
After you have made the desired DPI changes, don’t forget to save them by clicking on the “Apply” button at the bottom of the settings window.
Your SteelSeries mouse will automatically apply the changes, and you can go ahead and test the sensitivity to ensure that the new DPI settings are to your liking.
Tips for Choosing the Right DPI Settings
Determining the correct DPI setting for your SteelSeries mouse can significantly impact your gaming experience. While the ideal DPI setting will depend on your personal preferences and gaming style, here are some general tips to help you choose the right DPI settings:
Low DPI for Precision
If you need high-precision movements, such as when sniping in first-person shooter games, a low DPI setting is ideal. It will enable you to make small, accurate movements with more precision and control.
High DPI for Speed
A higher DPI setting is ideal for games that need fast, fluid movements. This setting allows you to move the cursor across the screen more quickly without much hand movement.
Experiment with Different DPI Settings
You may find that a particular DPI setting may work better for certain games than others. Take time to experiment with different DPI settings to find the one that works best for you. Don’t be afraid to try out different DPI settings until you are satisfied with the results.
Final Thoughts
Changing the DPI setting on your SteelSeries mouse can make a significant difference in your gaming experience. By following the easy steps mentioned above, you can fine-tune your SteelSeries mouse to provide the ideal sensitivity you need. Remember to experiment with different settings to find the one that works best for you. With the right DPI setting, you’ll be able to take your gaming to the next level.

