To connect a Plantronics headset to a computer, laptop, or PC, simply plug in the USB connector or audio jack into the corresponding port on the device. For Bluetooth connectivity, enable Bluetooth on the computer, put the headset in pairing mode, and select it from the available devices list.
How to Connect Plantronics Headset to Computer/Laptop/PC
In today’s digital age, communication is key, whether it’s for work, gaming, or simply staying connected with friends and family. Plantronics headsets are renowned for their quality and functionality, making them a popular choice for users looking to enhance their audio experience.
If you’ve recently purchased a Plantronics headset and are wondering how to connect it to your computer, you’re in the right place. In this guide, we’ll walk you through the simple steps to seamlessly connect your Plantronics headset to your computer, laptop, or PC.
Step 1: Check Compatibility
Before you begin the connection process, ensuring that your Plantronics headset is compatible with your computer’s operating system is essential. Most Plantronics headsets are designed to work with a wide range of devices, including Windows PCs, Mac computers, and Linux systems. However, it’s always a good idea to double-check the compatibility information provided by Plantronics or refer to the user manual for specific instructions.
Step 2: Locate the Correct Ports
Next, you’ll need to locate the appropriate ports on your computer for connecting your Plantronics headset. Depending on the model of your headset and your computer’s configuration, you may have several options for connectivity:
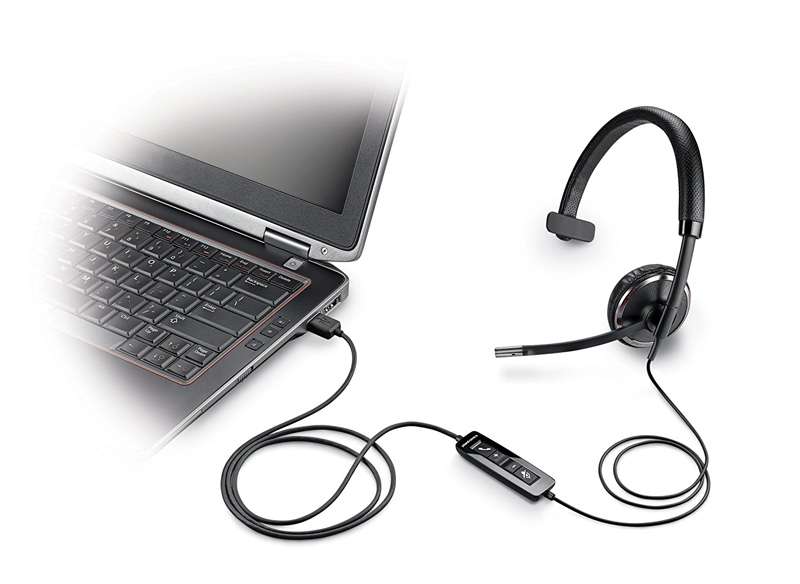
USB Port: Many Plantronics headsets come with a USB adapter for easy plug-and-play connectivity. Insert the USB adapter into an available USB port on your computer.
Audio Jacks: If your Plantronics headset uses standard audio jacks, locate the headphone and microphone ports on your computer. These are typically color-coded green for the headphone jack and pink for the microphone jack.
Bluetooth: Some Plantronics headsets offer Bluetooth connectivity, allowing you to pair them wirelessly with your computer. Make sure that Bluetooth is enabled on your computer and follow the pairing instructions provided with your headset.
Step 3: Connect Your Plantronics Headset
Once you’ve identified the appropriate ports or adapter for your Plantronics headset, it’s time to make the connection:
For USB Connection:
Plug the USB adapter into an available USB port on your computer. Your computer should automatically detect the headset, and you’ll be ready to use it for audio input and output.
For Audio Jacks:
Insert the headphone plug into the green headphone jack on your computer, and the microphone plug into the pink microphone jack. You may need to adjust your computer’s audio settings to recognize the headset as the default audio input and output device.
For Bluetooth:
Follow the pairing instructions provided with your Plantronics headset to pair it with your computer via Bluetooth. Once paired, you can select the headset as the audio input and output device in your computer’s Bluetooth settings.

Step 4: Test Your Connection
After connecting your Plantronics headset to your computer, it’s a good idea to test the connection to ensure everything is working correctly. Play some audio or make a test call to verify that sound is coming through the headset and that the microphone is picking up your voice accurately.
Step 5: Adjust Settings (Optional)
Depending on your preferences and the specific requirements of your computer setup, you may need to adjust audio settings or install additional drivers or software for optimal performance. Refer to the user manual or online support resources provided by Plantronics for guidance on adjusting settings or troubleshooting any issues.
Experts Tips and Recommendations
Here’s a step-by-step guide on how to connect a Plantronics headset to your computer/laptop/PC:
- Start by locating the right cable for your headset. If you’re not sure which one you need, consult the documentation that came with your headset or contact Plantronics customer support.
- Once you have the right cable, plug it into the audio port on your computer. If you’re unsure where this is, look for a jack labeled “line in” or “audio in.”
- Next, plug the other end of the cable into your Plantronics headset.
- That’s it! Your headset should now be successfully connected to your computer. You should be able to hear sound through the headset and use it for making and receiving phone calls.
If you have any trouble connecting your headset, Plantronics customer support will be able to help you troubleshoot the issue. In most cases, the problem is simply that the wrong cable is being used. As long as you have the right cable and connect it properly, connecting your Plantronics headset to your computer should be a breeze.
Conclusion
In Conclusion, Connecting your Plantronics headset to your computer is a straightforward process that requires just a few simple steps. By following the guidelines outlined in this article, you can enjoy crystal-clear audio and reliable communication on your computer, whether you’re working, gaming, or simply enjoying multimedia content.
Remember to check compatibility, locate the correct ports, make the connection, test your setup, and adjust settings as needed for the best possible experience. With your Plantronics headset seamlessly integrated with your computer, you’re ready to tackle any audio-related task with ease and efficiency.

